If you're seeing this same light leak pattern in your negatives shot with a Leica M5, your unit is suffering from a chronic problem exclusive to the fifth entry of the M family.
The following repair procedure is based on an official Leitz technical note dated 08/25/1975, composed by a German Leica technician for a French distributor/customer. As a result, the note was "translated" from German to French, making it very confusing and imprecise. Additionally, the accompanying sketch is also ambiguous.
Considering the obscurity of the original note, I had to decipher its content to develop an updated fix. As a result, the original felt material was replaced with regular gaffer tape due to the unavailability of the original component. In my opinion, gaffer tape is a much more reliable option than the original suggestion.
This is what you'll need:
-A small piece of gaffer tape;
-A cable release with a locking mechanism;
-A toothpick.
Procedure:
1- Cut two strips of gaffer tape, exactly 1mm wide and 20mm long each, using a razor blade or a sharp knife;
2- Stack one strip on top of the other to increase thickness;
3- Place the camera face up without a lens;
4- Use the cable release to lock the camera in Bulb mode;
5- With the shutter open, carefully attach the prepared tape on the location pointed out in Figure 1;
6- Ensure that half of the tape (10mm) is positioned to the left of the frame ("inside" the camera), while the other half (10mm) extends to the opposite side, starting from the beginning of the frame. Use a wooden toothpick to guide the tape and press it securely into place. See Figure 2.
Once done, your camera should look like Figure 3.
There's no need to worry about the curtain eventually touching the tape—there’s plenty of space there.
Now that the tape has been properly attached, the increased thickness will block the light from entering through the small rangefinder window and reaching the negative. Because the angle is so specific, even this slight increase in thickness is enough to block the light.
If you have any questions, different interpretations, or feedback on the fix, feel free to reach out to me.
Enjoy!
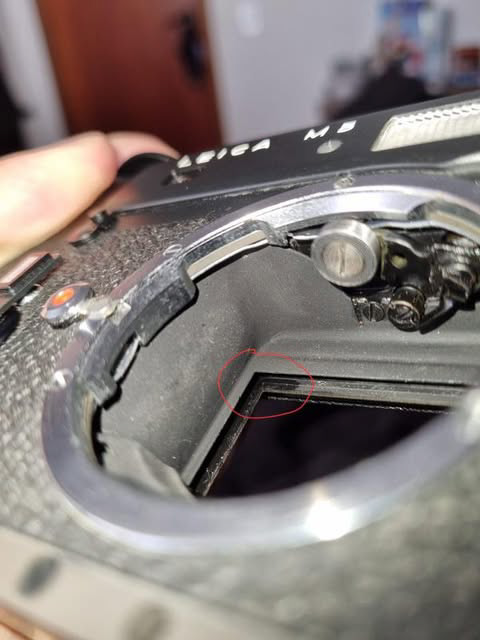
Figure 1 - The exact location
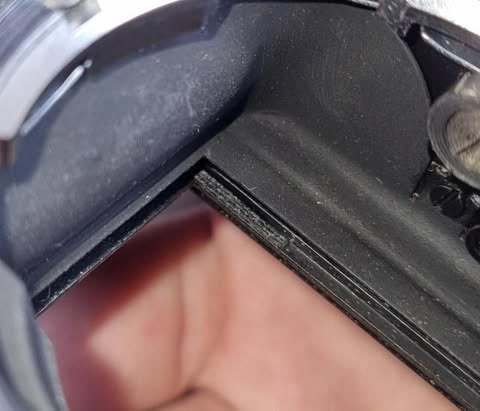
Figure 2 - You'll notice there's plenty of room on both sides to attach the tape. Ten millimeters will stay on the right, between both walls, while the other ten millimeters will begin at the edge of the frame
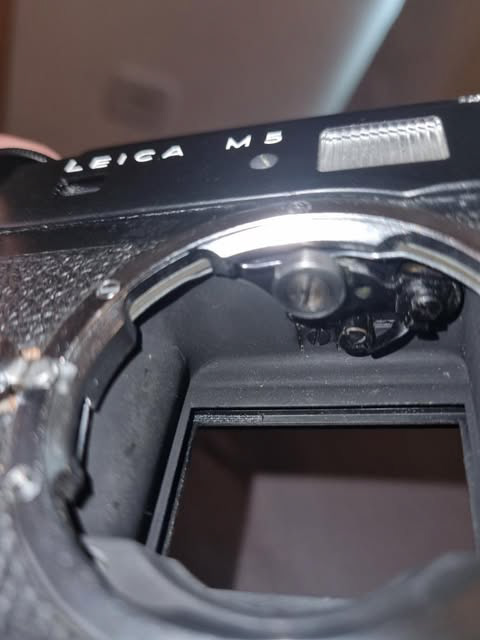
Figure 3 - Final Result